Wednesday, May 24, 2017

Mandibles Part III: Upper Mandibles

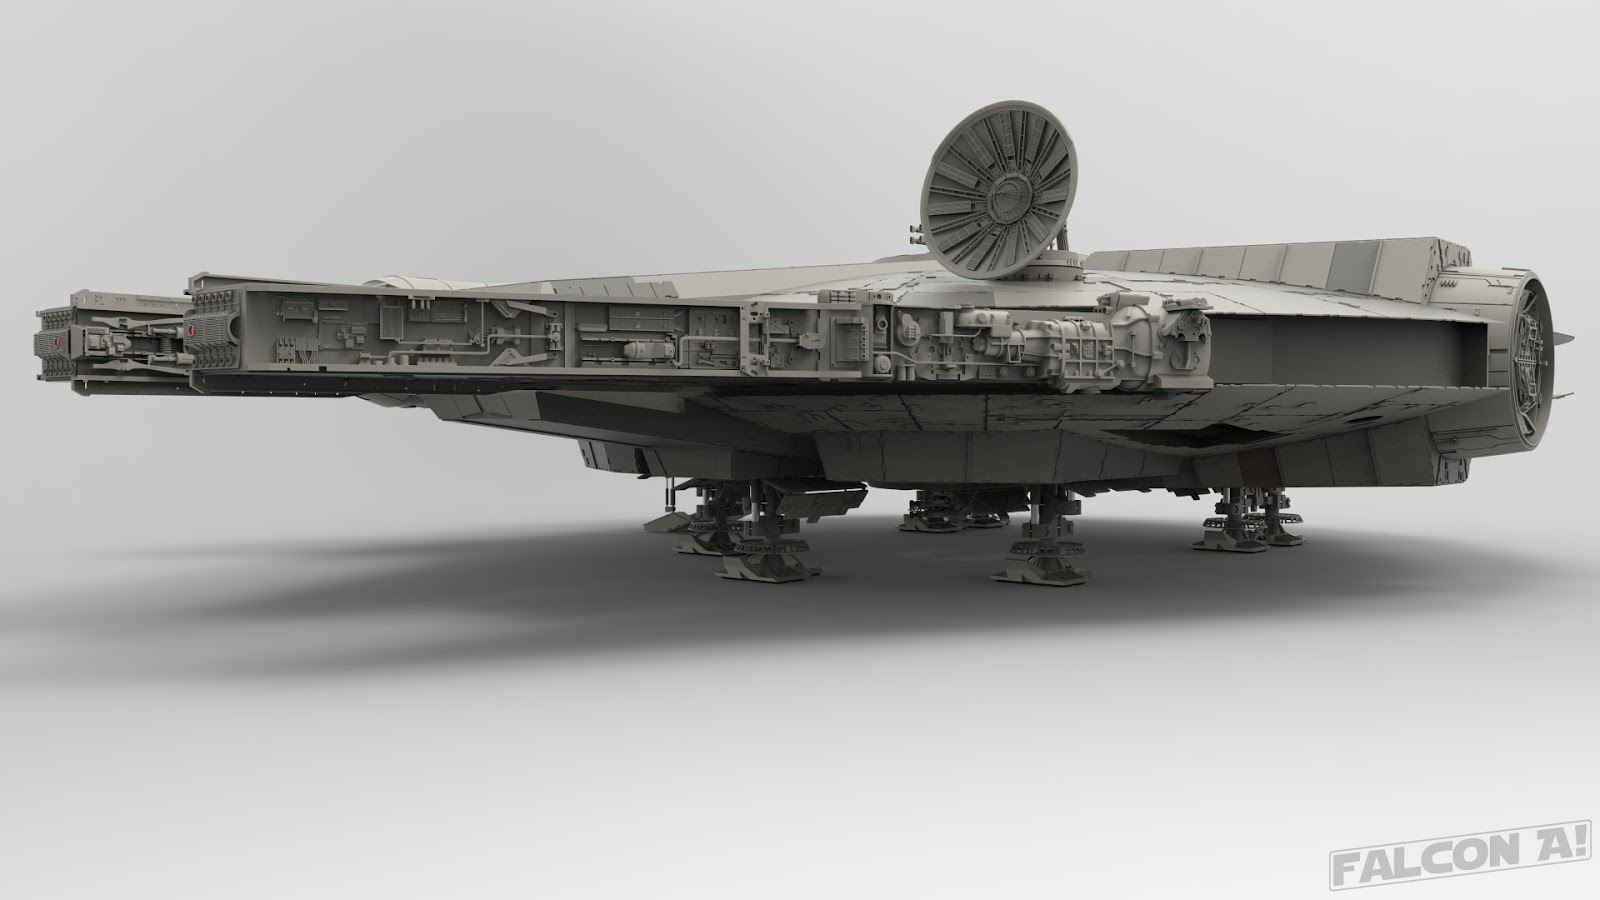
Here are some renders of the upper mandibles.
And here is the kit part breakdown of the upper mandibles:
The mandibles contain our first set of access pits, which are areas of detail recessed beneath the main hull.  I've included renders of what these groups of parts look like outside of the context of the mandibles for a closer look.  One of the things I find interesting about the greebles of the Falcon is that sometimes they are very localized.  For example, the P51 Mustang parts on the forward access pit on the port mandible are clustered together.  I can imagine whichever model maker was working on this part pulling this kit from the shelf and using these parts to quickly fill in this access pit.
Here's a render of our progress so far.  As always, thank you for reading!

Next time: Lower Mandibles: the spine tingling conclusion to the mandible saga!

Tuesday, May 16, 2017

Mandibles Part II: Outer Mandibles

There's not much to say this time, so let's look at some renders of the outer mandibles!
Here is the kit breakdown for the outer mandibles.  Sorry for the similarities in some of the colors, there are just too many kits involved here!

And as usual, our build progress so far.
The front 3/4 views of the ship are starting to come together!  Thanks as always for reading, or I guess looking at renders this time!

Next time: Upper Mandibles

Wednesday, April 26, 2017

Mandibles Part I: Inner Mandibles

One of the features that elevates the Millennium Falcon from the typical flying saucer (in addition to the cockpit of course) are two wedge shaped mandibles that jut out of the front of the ship.
The Haynes Owner's Workshop Manual describes a mechanism on the inner sides of these mandibles that serves as a tractor beam for cargo which is loaded into the ship between the jaws.  
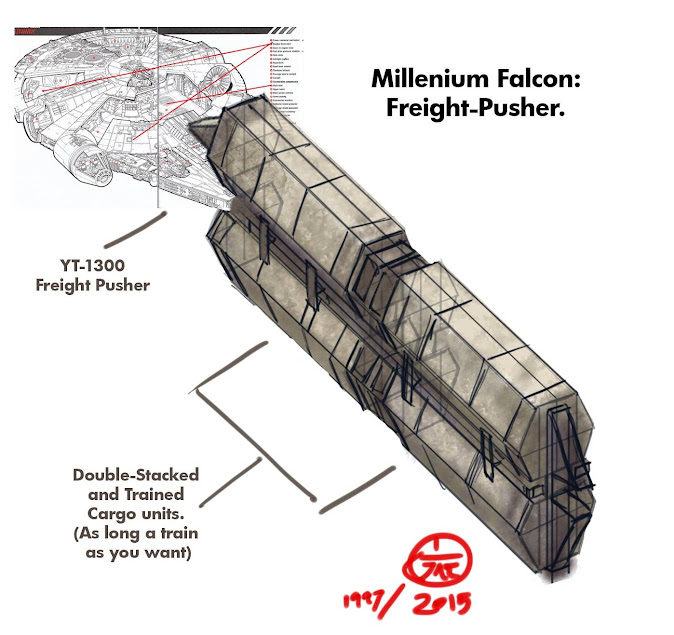
Another theory that has gained some traction recently is that the mandibles could latch on to cargo units that the Falcon pushes along.  This piece of concept art was posted on theforce.net forum by member jasonfry and illustrates this idea:
I really love this idea and hope to see it canonized one day, if not with the Falcon itself perhaps another YT-1300 freighter.  This would explain the Falcon's outboard cockpit, lack of serious cargo space on the inside of the ship and its large engine relative to the ship's size.  
These are a few renders of my model's inner mandibles:
It's plain to see they are essentially symmetrical, with only a couple of differences from left to right.  I was actually amazed to learn that a large kit piece used on this area is actually the frame and floorpan from a 1957 Chevy Bel Air model kit.
It's been cut up quite a bit, but it's there!  My dad owns a 1956 Bel Air so I've been around tri-fives (as the '55, '56, and '57 Bel Airs are called) my whole life.  I even modeled my dad's '56 in school.
Maybe I'm making too big of a deal out of this but I thought it was really cool to discover that this part lived on the Falcon.
Here's a breakdown of the rest of the kit parts on the mandibles:
The large pontoon bridge panels actually have some nice fine-scale detail when you look at the model kit parts.  My plan is to handle that kind of detail with texture maps later on.  Here's our progress so far:
I'm splitting the mandibles up over a few posts just because of the high volume of parts on them. Expect to see more soon, and as always, thanks for reading!

Next Time:  Outer Mandibles!

Falcons of all Sizes

Hey everyone, sorry for the long delay between posts, but I'm ready to get back to the action here! There are many Falcons in my life right now and I wanted to share some of the other things I have going on.
I was able to attend Star Wars Celebration in Orlando this year and met a few random awesome people.  One of the people I spoke at length with was Lee Malone who really faithfully recreated the 5 foot filming miniature of the Millennium Falcon.
This thing really looked incredible, and it was awesome to hear a bit about his process of tracking down the kit parts and decals. I've been lucky to have seen the real miniature and this is as close as anyone's going to get to the real thing.  There are more build photos on his Rogue Studio Productions Facebook page so be sure to check it out!
I've also been hard at work on a couple practical Falcon models of my own.  First this mini Bandai kit.
I had a lot of fun with this thing.  The engineering of how it all fit together without any glue was really incredible and the level of detail was really amazing for how small it is.  It was interesting trying to do weathering on something so tiny but I'm pretty happy with the results.
I also started assembling the DeAgostini Millennium Falcon which, finally after 2 years of monthly shipments I have all the parts to.  For those who don't know this is a pretty good replica of the 3 foot filming miniature that was built for ESB.  It's going to be a lot of work to paint it up nice and I'd like to make some improvements to the interior but it's been really fun assembling the exterior so far!  Here are some photos of my progress.
 
It was really interesting building this thing because I'm definitely more familiar with the 5 foot filming miniature so it was cool to see the details on this thing and how they're similar but very different.  It all felt so alien!  It's still an amazing model.  The size and heft of it is pretty impressive (it has an aluminum frame!)
ANYWAY, I'm rendering some images of the mandibles as I type this so another post should be on the way tonight.  Sorry again for the long wait, and as always, thanks for reading!

Wednesday, February 22, 2017

Docking Rings

On either side of the Millennium Falcon are two bucket shaped features called docking rings.  While they are present in all sets and miniatures, we never see them actually function on film.  Here are a couple of images of the docking rings on the 5 foot miniature.
One practical function these docking rings provided was to disguise mounting points on the filming miniatures.  The model was designed to be mounted from 6 points: front, back, sides top and bottom. This allowed it to be mounted and filmed from any angle.  Two of these points are hidden behind the hexagonal detail of each docking ring.  You can see in this image where this panel has been removed.
The docking rings are also a prime example of deterioration of the miniature over time.  Since the model was built over 40 years ago, pieces have broken off and exposed the dark primer under the off-white base coat of the Falcon.  You can see this in the above images of the 5 footer.  Since these parts are identifiable in older photos, I've included them in my model.  
Here are some renders of my docking rings.
 
And here is the breakdown of greebles for the docking rings.  The face of each ring is the same; I figured that if they were meant to have same function they would be identical.
Many of the larger greebles on the docking rings come from the Aurora Sealab III model kit.  In fact It's mostly made up of these 4 Sealab pieces, cut down and positioned in different ways.
You can also see that this piece was used as a strut where the docking rings meet the docking tunnels on the 5 foot filming miniature, but while organizing my model I included them with the docking tunnels so they will be featured in another post.  We'll be seeing a lot more of the Aurora Sealab III throughout this build.
Anyway, there's not much else to say about the docking rings.  The starboard docking ring famously has a huge blast blown into the side of it, but I will cover that in a later post about damage.  
As always, thank you for reading, and here are a couple of renders of our progress so far:
Next time: Mandibles Part 1

Monday, January 30, 2017

Dish Network!

According to the Haynes Owner's Workshop Manual for the Millennium Falcon, the ship is equipped with a military grade rectenna dish.  In fact, the first time we see the Falcon in Docking bay 94...  wait...  there is no dish!
Since only about half of this set was constructed, the dish was never built for A New Hope. Presumably the intention was to extend the set with a matte painting in post production, and maybe they never got around to it.  I remember thinking as a child that the dish was probably somehow able to fold down into the hull, but that seems kind of silly now.  Anyway, for the rest of the film, the ship has a rectenna dish which you can see here:
The dish on the 5 foot filming miniature is posable, and one of the interesting things I noticed in my research is that at some point between the filming of A New Hope and now, the dish was flipped around completely.  Take a look at this screen grab from ANH and this photograph from around the same time.
It's a little difficult to tell from these images but if you look closely you can see that the dish has 2 patches of grey paint on either side of the dish; small on the left and large on the right.  This modern photo shows that the large grey patch is on the left and the small is on the right, meaning that the dish was flipped over to face the back and around to face the front again.
My suspicion is that it happened after this photoshoot which has the dish looking super goofy pointed straight up.
The dish is famously knocked off in Return of the Jedi when Lando is flying through the superstructure of the second Death Star.  Not a scratch, my ass!
The damaged round dish gets replaced sometime before The Force Awakens with a new rectangular dish.  I affectionately refer to this dish as the "snow shovel."  The Haynes manual has a diagram of a similar looking dish and calls it a standard CEC (Corellian Engineering Corp for you non-nerds out there) civilian model sensor dish.  
Another bit of trivia is that this dish is based on the dish from the Tantive IV Blockade runner.  This ship was originally intended to be the Millennium Falcon but similarities to Space 1999's Eagle Transporter prompted a design change.  
Incidentally, ILM legend Bill George recently posted on his Sci-Fi Airshow website a model he created that is essentially the lovechild of the original Falcon design and the Eagle Transporter, The Millennium Eagle.  His page includes more history on the initial Falcon design that would become the Blockade Runner and a link to even more Falcon history!
ANYWAY, the dish was one of the first detailed parts I worked on for my build, and was based on this diagram from the Star Wars Blueprints book:
Here is a behind the scenes image from the Empire Strikes Back of Lando rescuing Luke that features this setpiece:
I built the radial details on the front of the dish based on the diagram above, but on the filming miniature many of them come from the Aurora Sealab model kit (see below).  I had also initially modeled the concentric rings seen in the image above, but left them out feeling the model looked too busy with them.  Here are some beauty shots of my dish (note that it's been rotated to it's original ANH position).
I also put together a diagram of the greebles on the dish that have been identified. This information is available on Gort's Kit ID thread but since I've kept track of this stuff I figured I would share here.  Addtional parts were identified by Lee Malone of Rogue Studio Productions.

Thanks again for reading!  I'll leave you with a render of our progress so far.

p.s.  I want to thank RPF user Jaitea for color correcting these classic shots of the Falcon recently.  I really enjoyed them!

Next time: Docking Rings